
Before we jump into the recipe, there are a few things that grandmothers would tell you when making rasam. Especially if its a tamarind based rasam.
# Rasam should never be brought to a roaring boil
# Salt should be added only in the end
# Always cook rasam at a low temperature
BUT WHY?
Traditionally rasam in Tamilnadu was made in eeya chatti. Eeyam or Velleeyam that’s used for cooking is nothing but a vessel coated with Tin. Tin is supposed to have health properties. But there was one problem. Tin has a very low melting point. Tin melts at a low temperature of about 200 – 230 °C. So the liquid cannot be heated up in a tin vessel for long. If heated for too long, the metal itself would start to melt.
Also reactive ingredients like tamarind, lemon and salt were never boiled for a long time in the vessel. That’s the reason lemon and salt were added during the end of cooking process. Tamarind water was never boiled for too long for the same reason. Rasam made in eeya chatti tastes different. But today, steel vessels have taken over every kitchen. So people have forgotten the reason as to why things were done in a certain way. But if one follows the same principles even today, you will end up with a lip smacking rasam that will cozy up your tummy and warm up your heart. You will end up with a rasam that tastes as close to your grandma.
Here is the video of the recipe.
Lets make traditional style poondu rasam today. Not in eeya chatti but in an everyday steel vessel. I adapted this recipe from a Coimbatore cookbook called “simply homemade” by Jayanthi Manohar. The book has recipes from the kongunad region. We will need to make “Jillakara Mirel” powder for this rasam. Its nothing but cumin and pepper powder. Grind the cumin and pepper in a mortar and pestle. Set aside. Also roughly crush the garlic cloves along with its peel. Set aside. Soak tamarind in 1 cup of water for 20 minutes. Squeeze the tamarind to make tamarind pulp. Discard the seeds and the pith. Add 2 cups of water to the tamarind pulp. Set aside. We will have 3 cups of liquid now.

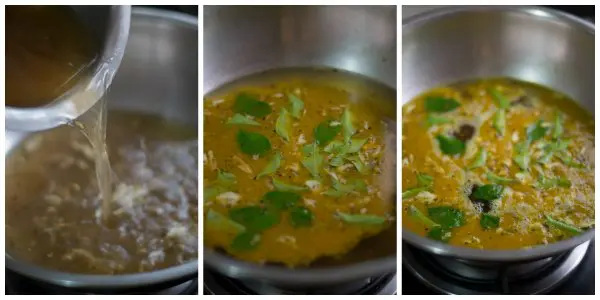
Heat sesame oil in a pan and add in the mustard seeds, fenugreek seeds and compound asafoetida / katti perungayam. Katti perungayam tastes so much better than the usual asafoetida powder. If you dont have compound, then you can add powder. Let the seeds splutter. Add in the crushed garlic and fry for a minute to roast the garlic. Add in the “Jillakara Mirel” / cumin-pepper powder and fry for 20 seconds. Frying the cumin and pepper brings out the essential oils in them and the final rasam tastes more flavorful.

Now add in the tamarind pulp and reduce the flame to low. Add in the curry leaves and turmeric. The flavor of curry leaves that is tempered in oil vs boiled in liquid is totally different. Add in the curry leaves after adding the tamarind liquid. Let it come to a mere simmer. The rasam will slowly foam up and slightly start to boil. That is it. Switch off the flame.
Green chillies are added in almost every rasam at the last in the kongunad region. It doesn’t make the rasam spicy but the chilli aroma gets steeped into the rasam and makes it so aromatic. Add in the coriander leaves and the salt.
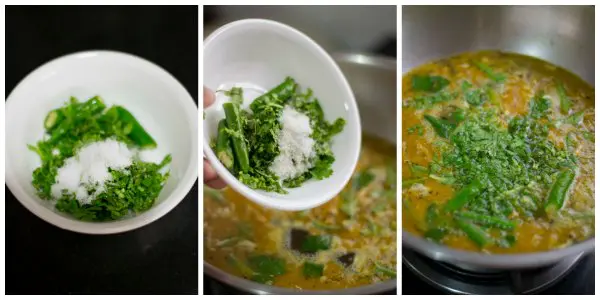
Now comes the important part. Immediately after adding these 3 ingredients, cover the rasam with a lid and allow the flavors to steep for 15 minutes.

Serve the rasam with rice for lunch.
Print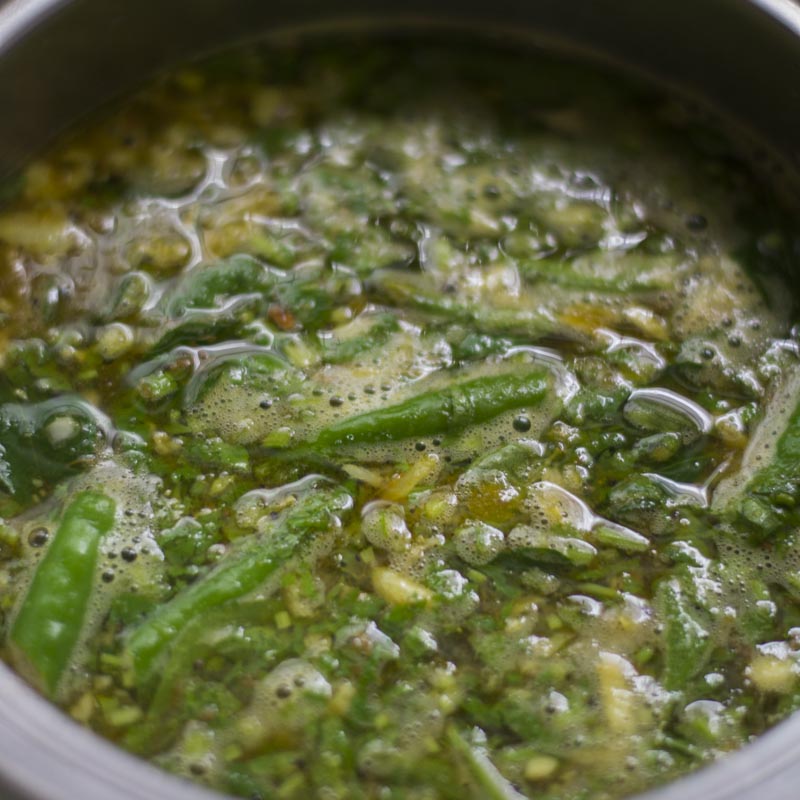
Poondu Rasam Recipe / Why Rasam should never be boiled for a long time?
Recipe for Tamilnadu style poondu rasam. Very good for digestion and very tasty.
- Total Time: 20 mins
- Yield: 4 persons 1x
Ingredients
- 1 teaspoon sesame oil (gingely / nallennai)
- 1/4 teaspoon mustard seeds
- 1/8 teaspoon fenugreek seeds
- a big pinch asafoetida
- 1 teaspoon cumin seeds
- 1 teaspoon black pepper corns
- 12 cloves garlic
- 1/2 a lime size tamarind
- 2 sprigs curry leaves
- 1/2 teaspoon turmeric
- 1 teaspoon salt
- 2 green chillies, chopped
- 2 sprigs coriander leaves, chopped
- 3 cups water (750 ml)
Instructions
- Grind the cumin and pepper in a mortar and pestle. Also roughly crush the garlic cloves along with its peel. Soak tamarind in 1 cup of water for 20 minutes. Squeeze the tamarind to make tamarind pulp. Discard the seeds and the pith. Add 2 cups of water to the tamarind pulp. Set aside. We have 3 cups of liquid now.
- Heat sesame oil in a pan and add in the mustard seeds, fenugreek seeds and compound asafoetida. Let the seeds splutter.
- Add in the crushed garlic and fry for a minute to roast the garlic. Add in the cumin-pepper powder and fry for 20 seconds.
- Now add in the tamarind pulp and reduce the flame to low. Add in the curry leaves and turmeric. The rasam will slowly foam up and slightly start to boil. Switch off the flame.
- Add in the chopped green chillies, coriander leaves and the salt.
- Cover the rasam with a lid and allow the flavours to steep for 15 minutes.
- Prep Time: 10 mins
- Cook Time: 10 mins
- Category: Rasam
- Cuisine: Tamilnadu

Hi, Lovely recipe! when we eat rasam with rice,won’t the garlic skin stick in the mouth?do I sieve the skin away?Thank you for all the lovely recipes.This is the site I come to,for all the traditional recipes and they come out so well.
Hi Geetha, While eating, you peel the skin and eat the flesh alone. You do not eat the skin.
Thank you,Suguna.
Hello sis , today tis rasam made our lunch perfect ! Never tried a rasam without tomato, its 👌👌👌👌 easy method too 👌👍
Thank you!
Very nice recipe and going Suguna. Good to see you on page 1 on Google search
Thank you so much.
Hi there, is it okay to add paruppu Jalam to this at the end as we do with typical rasam? I am looking forward to trying this tomorrow!
Am a big fan of rasam. Tried this out today and wasn’t disappointed. Adding green chillies does give a kick to it. Not done it before. Loved it. Thanks.
Hi Suguna,
Great recipe, will definitely try it out. I would like to know if it is ok to reheat the rasam multiple times. Will it affect/modify the taste?
Thanks
Hi Prathibha, You can reheat but the taste will differ.
hi suguna, please clarify the amount of tamarind approximately in grams.. coz my rasam either has too little or too much tamarind… thanks in advance..
15-20 grams
Hi Suguna,
This is one of the best rasams I have ever made and tasted!!! I once made typical iyer (which I am) tomato with toor dall water rasam for my iyengar friend, she tasted it and immediately said that I over cooked the rasam! I was really sad coz after that I did a few attempts but never got it right!! so much when my grandmom was known for knowing minimum of 70 types of rasams!!
so this rasam, the technique you have explained here – is just amazing!!Thank you! I cant wait to try the beetroot rasam next!!
Thank you so much. Happy Cooking!
Made this rasam. Really came out well. Thanks for sharing your recipes. I frequently visit your blog and the recipes all I have tried so far have come out well.
Thank you so much!
Hi Suguna
Tried out this rasam a day back. This was the best rasam I have ever tasted,the flavors came out so well. Thanks for posting. Your website is awesome. ????.
Best Regards
Bindujayadevan
Thank you so much Bindu. Really glad you liked the recipe.
I tried this rasam a few montha ago and I have to say that after tasting it , this is the only way I make rasam these days. It is absolutely delicious . Thanks for sharing the recipe Suguna 🙂
Thank you so much Laavy!
Can tomatoes be added to poondu rasaim
You can!
Hello Mrs.suguna,
In the tomato Rasam, u had told to add some ghee @ the end where as in here you have not mentioned. Can you tell why s that so?
Thank you
Muthukrishnan Bose.
Not all rasams need ghee 🙂 The flavor of garlic is pungent and predominant here.
Dear Suguna, what quantity of water shall we use?
Thank you Agi for pointing it. Have updated the recipe!
Thank you so much!
Your website is just great. Thank you for your time, effort and love dedicated to it.
Suguna, successfully traced this interesting old post which I read a couple of years ago:
Suguna, that settles it! Was wondering when I read this note of not to boil rasam for long. Thanks! But isn’t eeyam supposed to be “lead” (which also has a very low melting point)? We had a couple of brass vessels coated on the inner sides with lead. Infact the tip given when using an eeya chatti is to never keep it dry over fire/stove. It always had to be with water or some liquid substance (like tamarind water). So ideally, eeya chatti is not to be used for the initial seasoning as done in most dishes.
There are two types of eeyam, First one being vella eeyam, ie tin and the second one being kari eeyam or lead. When in olden days they said eeyam chatti, they meant vella eeyam or tin. Lead is poisonous Ravi. I am doubtful if your vessel is coated with lead. I am pretty sure it must be tin. If it is lead, please stop using it. Tin was also known in tamil literature as Vangamm. A compound mixture of Tin was aslo called as vanga basmam. It was used as medicine to treat diabetes in olden days.
Thanks for taking the time to provide the clarification Suguna. Yes, have heard that since lead is poisonous, its not heated directly. Now I am more excited to know the history – let me check about it with my grandmom and dad. Ofcourse, who uses the heavy vengalam vessels these days? Few were reserved for making the vadagam/vaththal koozh during summer.