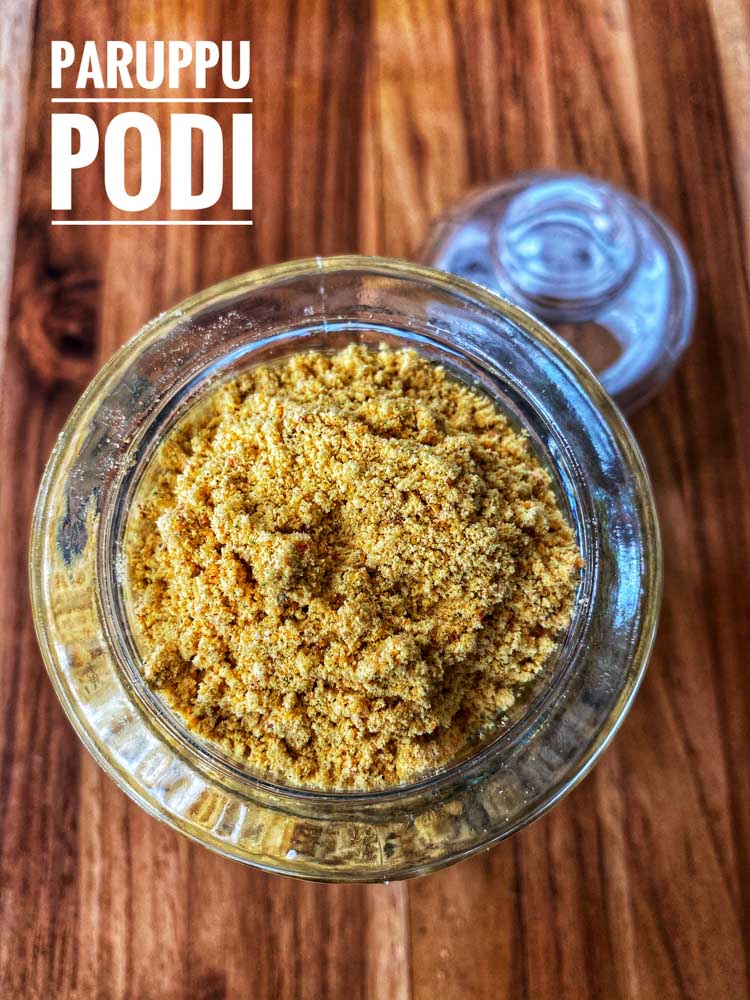
Paruppu podi recipe for rice. Paruppu podi made with the addition of Garlic – Andhra style. Kandi Pappu podi recipe. Recipe with step by step pictures and video.
Andhra style paruppu podi with garlic / Kandi pappu podi served with hot white rice and ghee is a meal in itself. This is a very simple recipe and can be made at home in under 20 minutes. The lentils, garlic and spices are roasted and ground to a powder. We like the podi ground fine at home. If you like a coarse texture, set aside a tablespoon of the lentil mixture before grinding. Grind the rest of the mixture to a fine powder and add back the lentil mixture and pulse a few times so the lentils added retain its coarse texture. Adjust the spice levels according to your taste. I add a few Byadagi / Kashmiri chillies for colour along with the regular Gundu chillies. The garlic is used in this recipe along with the skin. The roasted skin gives a fantastic aroma and flavour. If you want a paruppu podi that is deep yellow in colour, omit the curry leaves. Store the podi in a airtight container and use it within a month.
Here are other chutney podi / idli podi recipes from the site
Chutney Powder recipes
Here is the video of how to make Paruppu Podi Recipe with Garlic
Here are the step by step pictures of how to make Paruppu Podi Recipe with Garlic
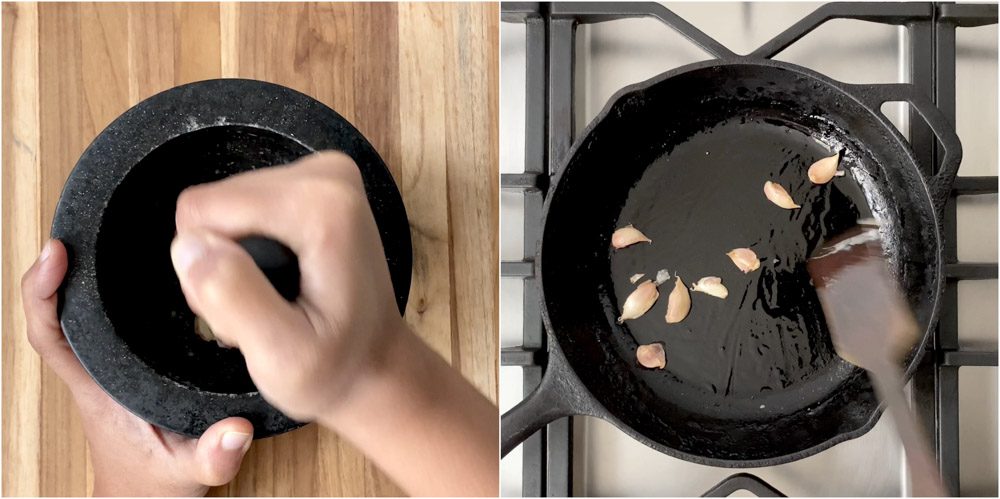
Slightly smash the garlic along with the skin. Add it to a hot skillet along with a little coconut oil. Roast for a minute. Set aside to cool. The skin adds a lot of aroma and flavour to the powder.
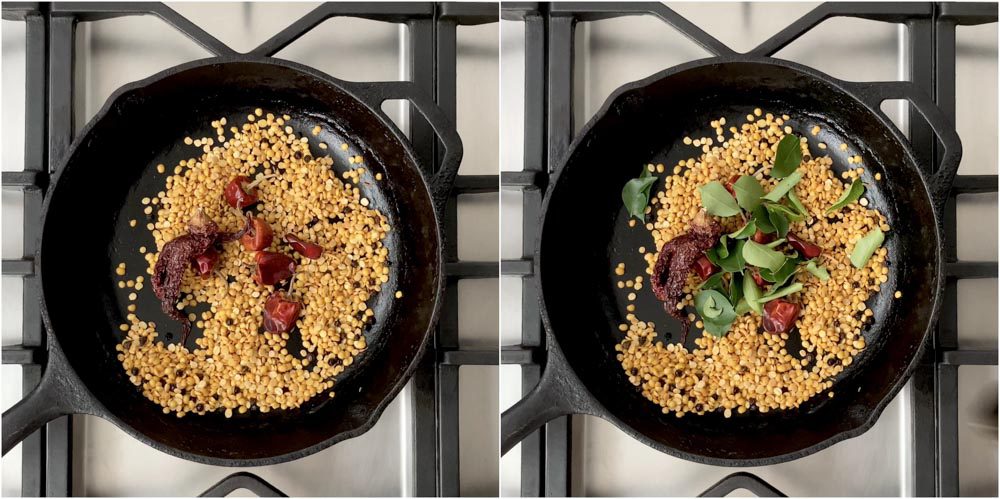
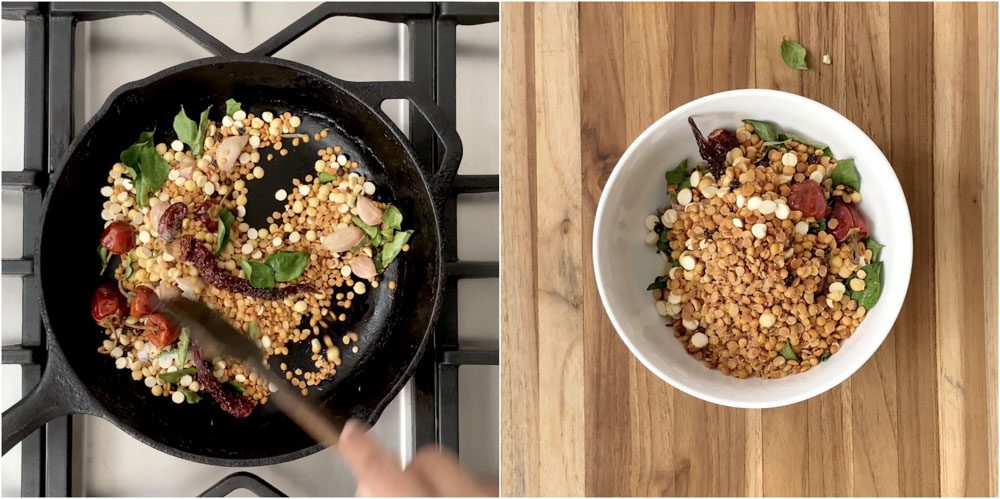
Add in the toor dal to the pan. Add in the cumin seeds and black pepper. Dry roast on a low flame. Low flame is key as you do not want to burn the lentils. Roasting on a low flame brings out a lot of flavour from the lentils.

After a couple of minutes add in the red chillies and the curry leaves. If you want a bright yellow colour powder, omit the curry leaves. Dry roast all the ingredients on a low flame until the lentils are golden in colour.
Add in the fried gram / pottu kadalai and dry roast for a few seconds.
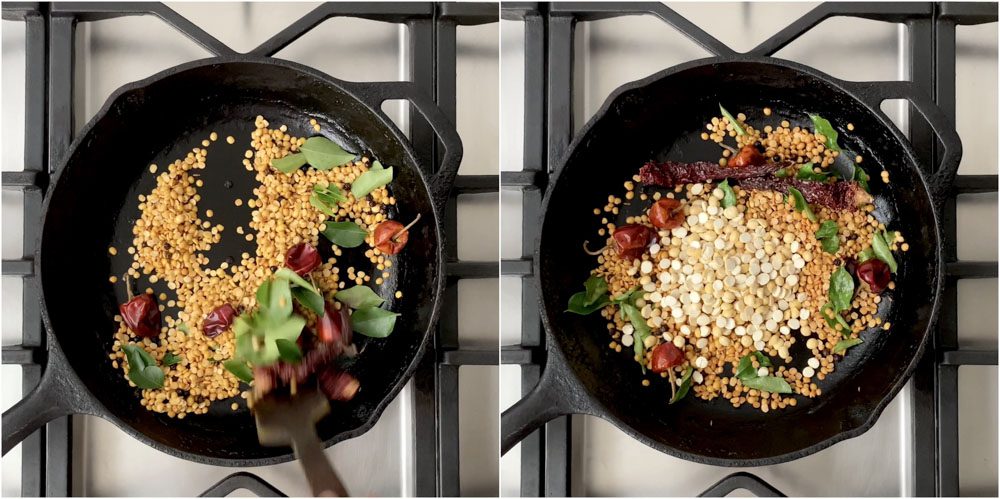
Switch off the flame and add back the roasted garlic, asafoetida and salt. Mix well to combine.

Immediately, transfer the roasted mixture to a plate / bowl. Let it cool completely. Do not leave the mixture in the pan as it will still continue to cook the lentils and the lentils may burn.
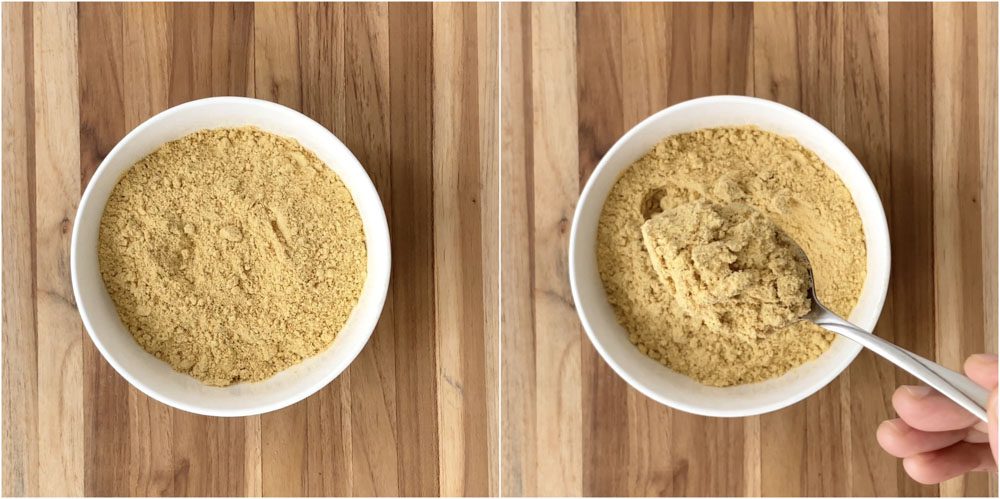
Grind the mixture to a fine powder. We like the podi ground fine at home. If you like a coarse texture, set aside a tablespoon of the lentil mixture before grinding. Grind the rest of the mixture to a fine powder and add back the lentil mixture and pulse a few times so the lentils added retain its coarse texture.
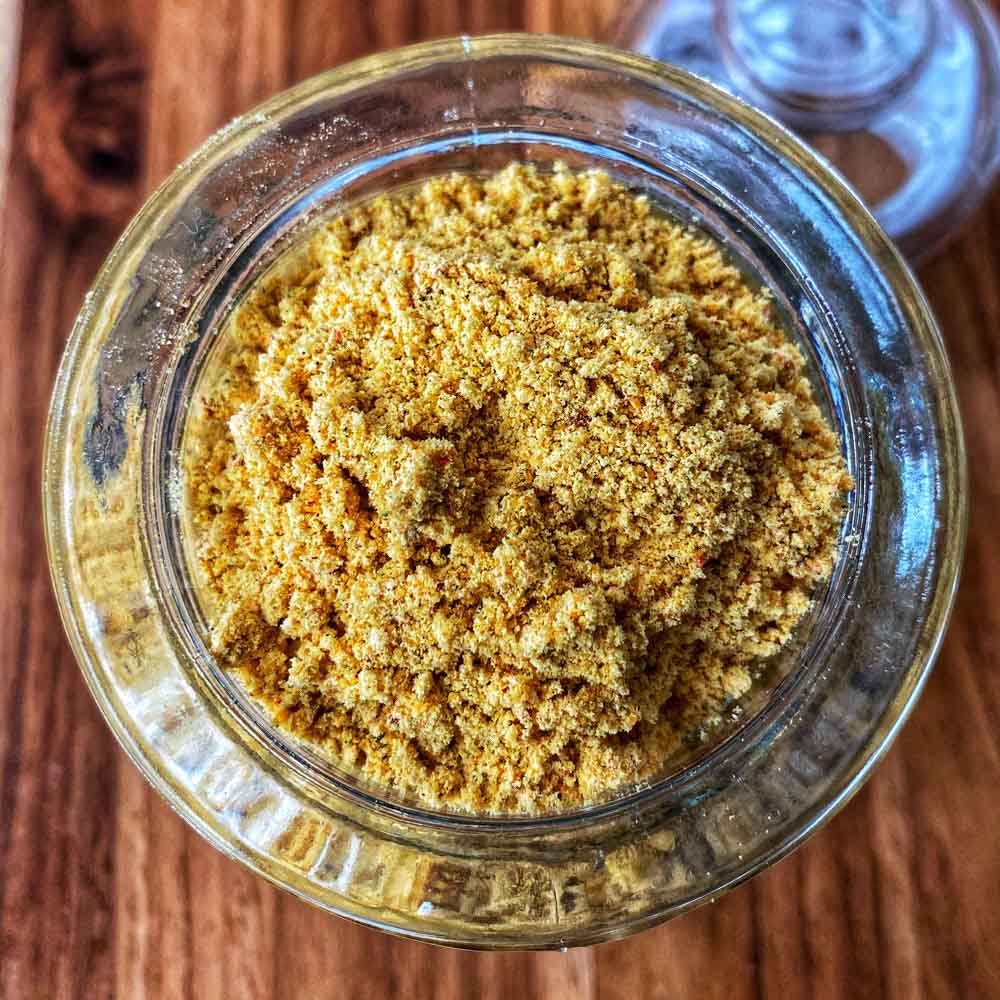
Store the podi in a airtight container and use it within a month. Serve the podi mixed with rice and hot ghee.
Paruppu Podi Recipe with Garlic
Paruppu podi recipe for rice. Paruppu podi made with the addition of Garlic – Andhra style. Kandi Pappu podi recipe. Recipe with step by step pictures and video.
- Total Time: 20m
- Yield: 1.5 cups 1x
Ingredients
6 cloves of garlic
1/2 teaspoon coconut oil
3/4 cup toor dal
1/4 teaspoon cumin seeds
1/2 teaspoon black pepper
6 dried red chillies
2 Byadagi / Kashmiri red chillies
2 sprigs curry leaves
1/2 cup fried gram (pottu kadalai)
1/4 teaspoon asafoetida
1 teaspoon salt
Instructions
Slightly smash the garlic along with the skin. Add it to a hot skillet along with a little coconut oil. Roast for a minute. Set aside to cool. The skin adds a lot of aroma and flavour to the powder.
Add in the toor dal to the pan. Add in the cumin seeds and black pepper. Dry roast on a low flame. Low flame is key as you do not want to burn the lentils. Roasting on a low flame brings out a lot of flavour from the lentils. After a couple of minutes add in the red chillies and the curry leaves. If you want a bright yellow colour powder, omit the curry leaves. Dry roast all the ingredients on a low flame until the lentils are golden in colour. Add in the fried gram / pottu kadalai and dry roast for a few seconds.
Switch off the flame and add back the roasted garlic, asafoetida and salt. Mix well to combine. Immediately, transfer the roasted mixture to a plate / bowl. Let it cool completely. Do not leave the mixture in the pan as it will still continue to cook the lentils and the lentils may burn.
Grind the mixture to a fine powder. We like the podi ground fine at home. If you like a coarse texture, set aside a tablespoon of the lentil mixture before grinding. Grind the rest of the mixture to a fine powder and add back the lentil mixture and pulse a few times so the lentils added retain its coarse texture.
Store the podi in a airtight container and use it within a month. Serve the podi mixed with rice and hot ghee.
- Prep Time: 10m
- Cook Time: 10m
Hello,
I made the podi but the smell of garlic is not coming at all . Not sure where I went wrong..
You can add more garlic if you prefer a robust flavour.
I could not find the option to add comments on the onion thattai recipe, so adding it here. I tried making it for this year’s Diwali (yes, yes, getting an early start to the snacking ;)) – it came out great! So addictive. Especially with a cup of hot tea – mmmm.
It did take me 1.5 hours to fry the entire batch (I used the regular 250ml cup and scaled the rest of the recipe accordingly) but must say it was so totally worth it!
Thank you!
My Favourite Paruppu Podi with Ghee. Nice Recipe. Thank You for Sharing this Recipe.
Thank you!
These are simple and fast to prepare and everyone enjoyed them!Absolutely delicious!
Thank You!